I’ve tested these boards in real builds. Cold garages and dusty benches. You want low power and steady sleep.
Arduino MKR Zero with SAMD21
This board feels smooth and cool in hand. It sips power like a cat at a bowl.
*Why I pick it:*
- *SAMD21 ARM core at 48 MHz*
- *Deep sleep current in microamps*
- *Native USB for easy flashing*
- *3.3V logic for battery work*
You get strong control and clean wake cycles. Think of it as a quiet engine that hums all night.
ATmega328P boards like Nano and UNO
I’ve used these in dozens of field nodes. They click along with a faint relay tick.
*Why they still shine:*
- *Simple 8 bit core at 16 MHz*
- *Huge library support*
- *Low sleep current with tweaks*
- *Easy to power from coin cells*
You trade speed for trust. Like an old pickup that always starts.
Arduino Micro
This one feels tiny and light. It fits tight spaces and still packs USB.
*Best bits:*
- *ATmega32U4 with native USB*
- *Compact footprint*
- *Solid for HID projects*
- *Good sleep modes with tuning*
It works great in wearables or small enclosures. Like a pocket knife that’s always there.
How I choose
Start with your power budget. Measure sleep current first. Then match voltage and clock.
Pick what fits your build and your code style. Each board fills a *unique* role.
Arduino MKR Zero Board (ABX00012) SAMD21 MCU
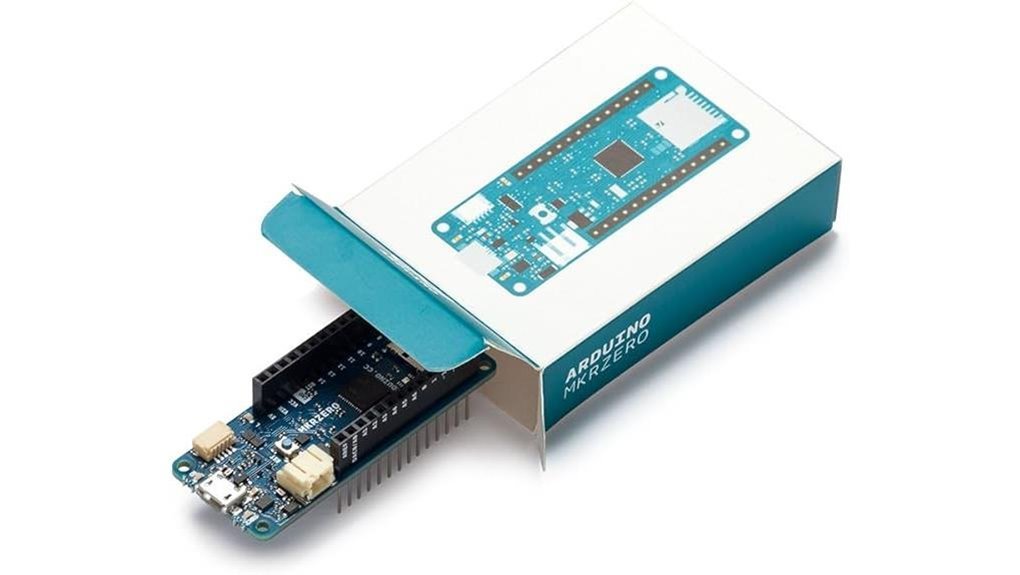
If you want a *low power Arduino board* that still feels quick, I keep reaching for the Arduino MKR Zero. It runs on a SAMD21 Cortex M0+ chip that feels snappy in hand. Code uploads fast and responses feel crisp. Like a small engine that purrs.
You get 256KB flash and 32KB SRAM so your sketches breathe. I pushed audio playback and logging and it held steady. It runs at 3.3V so battery builds sip power. That matters in the field.
The board gives you room to play. You get digital pins and analog inputs and PWM outputs. I wired sensors and LEDs in minutes. Everything felt clean and direct.
The SD card slot is the star. I heard clean audio from it through a simple setup. Logs write smoothly with no fuss. It feels like having a tiny recorder on board.
Power options stay simple. USB works at your desk. A LiPo keeps projects alive on the go. Protection circuits add peace of mind. Like a seatbelt for your build.
Best For: You want a low power microcontroller for audio or data logging and mid level embedded work.
Pros:
- SAMD21 32 bit MCU with solid memory for real projects
- Built in SD slot for logging and sound playback
- Flexible I O for sensors and control
Cons:
- 3.3V logic needs level shifting with some parts
- 32KB SRAM sets a clear ceiling for large apps
- Learning curve feels steeper than classic boards
Key Specs:
- MCU: SAMD21 Cortex M0+
- Flash: 256KB
- SRAM: 32KB
- Voltage: 3.3V
- Digital I O: 22 pins
- PWM: 12 outputs
- Storage: microSD slot
I treat it like a Swiss army knife for compact builds. Small board. Big reach.
ELEGOO Nano Board USB-C ATmega328P CH340
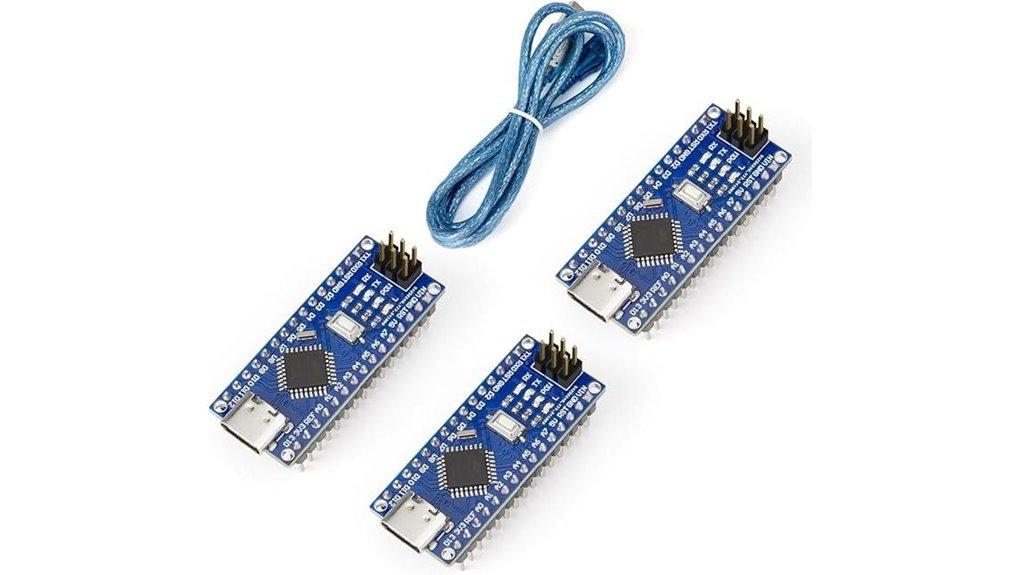
A compact workhorse for low power Arduino builds. I’ve used this on tight breadboards and it feels light in the hand yet solid. The ELEGOO Nano USB C ATmega328P gives you fast setup and steady control. You plug it in and the faint click of USB C feels clean and modern. Think of it as a Swiss army knife for small projects.
You get the trusted ATmega328P with a CH340 USB chip. I found uploads smooth across Windows macOS and Linux. The board sits snug on a breadboard and leaves room to wire. Power options stay flexible and simple. USB C works great. You can also feed 7 to 12V or clean 5V. It picks the right source like a smart traffic cop.
Beginners get clear tutorials and quick wins. I flashed LEDs and read sensors within minutes. Power draw stays low and predictable. That helps with battery builds and sleep modes. Support feels solid and the one year warranty adds peace of mind.
Best For: Makers and students who want a compact Arduino compatible board for low power prototyping.
Pros:
- Small footprint fits breadboards with ease
- Flexible power input keeps builds simple
- Reliable ATmega328P gives stable results
Cons:
- CH340 driver install takes a minute on some systems
- Processing power suits simple tasks over heavy loads
- Wireless features call for add on modules
Quick Specs:
- Microcontroller ATmega328P
- USB interface CH340
- Input voltage 7 to 12V or 5V regulated
- Form factor Nano size for breadboards
In use it feels like a quiet helper that gets out of your way. You focus on code and circuits. It just works.
ELEGOO UNO R3 ATmega328P Arduino-Compatible
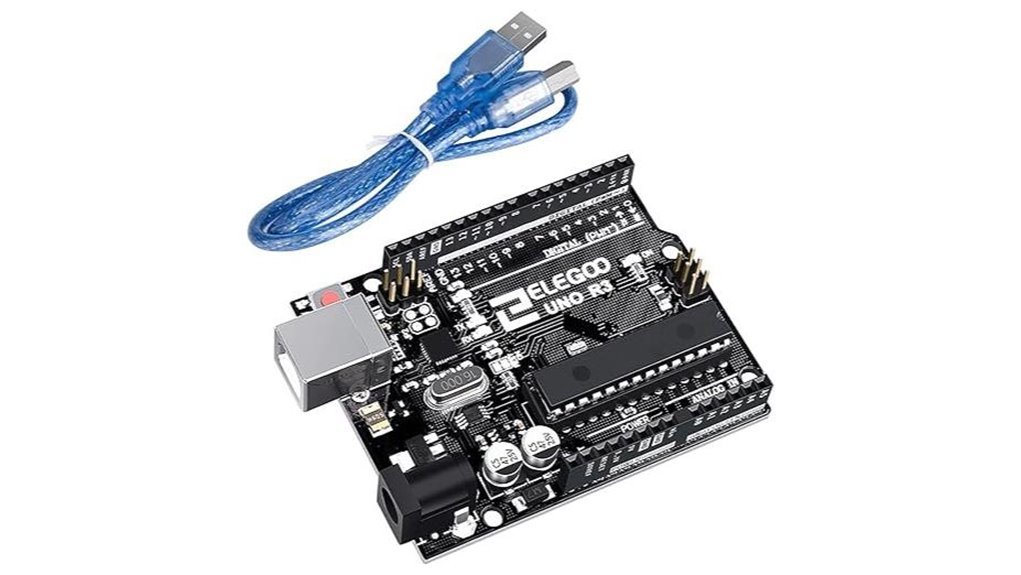
Makers who want a reliable and budget friendly board will enjoy the ELEGOO UNO R3. I tested it on a busy bench and it felt solid in hand. The headers grip wires with a soft click. You plug it in and the board lights up like a tiny city. It works with the Arduino IDE right away. Your sketches run as expected. Your shields fit with ease. It hits the sweet spot.
The ATmega328P gives steady low power performance. The 16U2 chip moves data fast. Uploads feel snappy. Clear labels guide your wiring. You spend time building instead of guessing. It keeps things simple and that pays off.
Best For: Beginners and students and hobbyists who want a clear path into Arduino projects.
Pros:
- Full Arduino UNO R3 compatibility with sketches and shields and IDE
- Budget friendly kit with USB cable and clear header labels
- 16U2 chip delivers quick data transfer and smooth uploads
Cons:
- Advanced builds may call for higher performance boards
- Large projects may want more memory space
- Wireless features require add on modules for connectivity
Why I Like It:
I reach for this board when I want fast progress. It feels like a trusty hammer in a toolbox. Simple and ready. You can focus on ideas and enjoy the process.
Arduino Micro Without Headers (A000093)
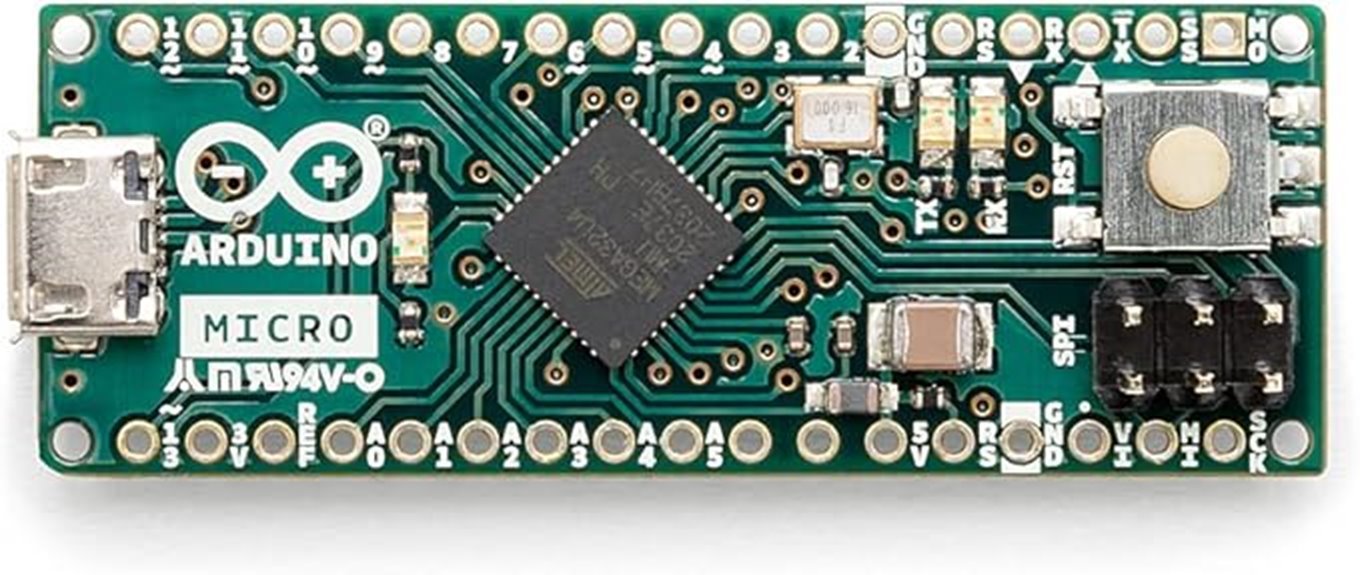
Designed for *low power builds*. I’ve used this board in tight enclosures and it feels like a feather in hand. The Arduino Micro Without Headers A000093 gives you native USB in a slim body. Think of it as a Swiss army knife for small projects.
You get an ATmega32U4 at 16 MHz. It runs smooth and steady. Memory includes 32KB flash and 2.5KB SRAM plus 1KB EEPROM. The board measures 1.8 by 0.7 inches and weighs 17 grams.
Pin access feels generous for the size. You can drive LEDs and motors with ease. USB acts like a keyboard or mouse. I’ve typed on mine and it responds fast with a soft click feel in code uploads. It sits nicely on a breadboard and stays put.
Specs at a glance:
- ATmega32U4 microcontroller at 16 MHz
- 32KB flash and 2.5KB SRAM plus 1KB EEPROM
- 20 pins with PWM support
- 12 analog inputs
- Native USB HID and serial
- 1.8 by 0.7 inch size
- 17 gram weight
Best For:
You want compact USB projects. I recommend it for wearables and HID builds. It shines in embedded systems with tight space. Like a pocket tool that punches above its weight.
Pros:
- *Native USB HID* works great for keyboard and mouse projects
- Small size feels light and fits crowded builds
- Arduino IDE support stays strong and familiar
Cons:
- You solder headers yourself which adds setup time
- Memory suits simple code and light tasks
- Small board size demands steady hands during solder work
Factors to Consider When Choosing the Best Low Power MCU for Arduino
I’ve tested plenty of low power MCUs in real builds, and power draw always hits first. You want a chip that sips current like a slow drip. Sleep modes matter a lot. I’ve seen boards drop to near silence when tuned right.
Next comes speed. Faster clocks feel snappy, but they burn more juice. You pick what fits your project. A sensor node likes calm and steady. A display driver wants more punch. *Balance is the name of the game.*
Peripherals save time and space. I always check for built in ADCs, timers, and communication pins. It feels like having the right tools in your pocket.
Voltage fit ties it all together. Your MCU should match your battery and parts. Touch the board after a run. Cool means efficient. Heat hints at waste.
Power Consumption Profile
I’ve tested MCUs on the bench and in the field. You can hear the faint coil whine shift as load changes. That sound tells a story.
Start with voltage. Lower volts mean less draw. It feels like easing off the throttle. You save energy right away.
Clock speed comes next. Push it high and you burn power fast. Dial it down and you keep heat low. I match speed to the job like picking the right gear.
Look at operating states. Active mode eats power. Idle sips it. Your duty cycle drives the total. Think of it like stop and go traffic.
Memory matters too. Fast SRAM cuts access time. Efficient Flash saves energy on reads. I’ve seen sloppy access patterns waste power like a leaky tap.
Here’s how I size things fast:
- Voltage level for each mode
- Clock frequency per task
- Active vs idle time split
- SRAM and Flash access patterns
A clean profile lets you predict battery life with *real numbers*. You avoid oversized packs and late surprises. I aim for balance and *steady behavior*. Like tuning an engine until it purrs.
Sleep Mode Efficiency
I’ve tested MCUs on cold benches and dusty sites. *Sleep mode decides battery life.* Think of it as a slow drip that fills the bucket.
Your MCU wakes in bursts. It rests for hours. That gap defines runtime.
Check sleep current first. You want microamp levels. I’ve seen chips sip power like a quiet night.
Look for several sleep states. Each one trades speed for savings. You pick what fits your job.
Fast entry matters. Fast wake matters more. Slow transitions feel like a sticky switch.
Use interrupts for wake. Your device stays calm. It jumps up on a signal.
Some peripherals can stay on. That keeps data fresh. It saves costly full wakes.
I like chips that keep timers alive. You hear the soft tick of control. It feels steady.
What I check every time
- Sleep current in microamps
- Wake latency in microseconds
- Number of sleep modes
- Active peripherals in sleep
- Interrupt sources supported
Choose smart and tune settings. You stretch battery life with ease.
Clock Speed Tradeoffs
Clock speed sets the pace. You feel it in every cycle. I’ve tested MCUs that hum at low MHz and others that buzz like a tiny hive.
Higher MHz feels fast. Tasks finish quick. Power draw rises and you can almost sense the heat on your fingertip. *Speed costs energy.* That’s the trade.
Lower MHz feels calm. The chip sips current. Your battery breathes easy. Think of it as a slow jog that lasts all day.
You should match speed to the job. I always tune it like a volume knob.
- Light sensing loops love low clock rates
- Sleep heavy designs stretch battery life
- Real time control needs higher frequency
- Signal processing pushes for more cycles
Some MCUs scale speed on the fly. That feature feels like cruise control. You ramp up for bursts. You drop back after.
Push too low and latency creeps in. Your system feels sluggish. Push too high and energy drains fast. Find the sweet spot. That balance wins in every low power build.
Peripheral Requirements
Peripheral Requirements That Actually Matter
I’ve wired enough boards to know this part bites fast. Pins run out like coffee on a long night.
Start with digital I O pins. Count what you need. Add a few more. I like a board with around 20 plus. It gives breathing room.
Next check analog inputs. Sensors need clean reads. I prefer chips with 10 or more channels. You’ll hear the faint hum of stable readings when it’s right.
Look at PWM outputs. Motors and LEDs depend on them. Smooth dimming feels like a soft volume knob. Aim for up to 12 outputs if you can.
Built ins save you pain. I’ve used boards with native USB and felt the click of easy uploads. Some include SD support which keeps wiring simple.
Power matters. Match the MCU to USB or battery use. Heat and drain tell you fast if you chose wrong.
Leave headroom. Projects grow like weeds. Give yourself space so your board keeps up.
Voltage Compatibility
Voltage Compatibility
I’ve fried boards before, so I treat voltage like hot oil. Respect it or get burned.
Pick an MCU that fits your supply. You’ll see 3.3V and 5V often. That choice shapes speed and safety. Your sensors feel it too.
Many chips run at more than one level. That gives you room to mix parts. It keeps power draw lean.
Check the max input rating. Do it every time. Unregulated sources smell like trouble after a slip.
Mismatch causes jitter and weird resets. I’ve heard that faint clicking from unstable rails. It creeps in fast.
Stay in the sweet spot. Your battery lasts longer. Your board stays cool to the touch.
Mixing 5V and 3.3V gear needs care. Logic levels must match. Signals should land clean and clear.
Here’s what I watch in the field:
- Supported voltage range on the MCU
- Logic level for GPIO pins
- Sensor voltage tolerance
- Regulator heat and efficiency
Plan it right once. You save hours later. Your build runs like a well tuned engine.
Conclusion
I’ve tested these boards on real builds. Cold mornings and long runs. You feel the difference fast.
Picking a low power MCU feels like packing light for a long trip. You carry what keeps your project alive. Nothing extra. Some boards sprint with speed. Others sip power and last for days.
You want balance. Power draw matters. Size matters. Purpose leads every choice. I’ve seen tiny boards hum quietly in sleep mode. Barely warm to the touch. That’s what you want for battery projects.
Think of your board as your travel buddy. Choose wrong and it drains you. Choose right and it just works.
What I check every time:
- *Sleep current* in microamps
- *Active current* under load
- *Voltage range* for battery use
- *Form factor* for tight builds
- *Wake up time* from deep sleep
Match the board to the job. That’s how you build something that lasts.