Creating a home music studio offers a unique opportunity to personalize your workspace and enhance your musical production capabilities. As the demand for high-quality home recording environments grows, more musicians, producers, and hobbyists are opting for DIY solutions that allow them to build a professional studio setup within their own homes. Establishing a DIY home music studio can significantly enhance your ability to compose, record, and mix music while providing a creative and inspiring environment tailored to your needs.
By opting for a DIY approach, you can carefully select every component and design every aspect of your studio, ensuring it meets your specific requirements. Not only does this approach offer cost savings compared to purchasing pre-built studio setups, but it also provides you with the flexibility to customize your studio according to your personal preferences and workflow. This comprehensive guide will walk you through each crucial step of the DIY process, from planning and design to equipment setup and acoustic treatment. By following these guidelines, you will be well on your way to creating a highly functional and professional home music studio.
Step 1: Plan Your Studio Layout
Planning your studio layout is the foundation of creating an efficient and effective home music studio. Begin by selecting an appropriate room or space within your home. Ideally, this space should be quiet, isolated from external noise, and offer enough room to accommodate all necessary equipment. Measure the room’s dimensions carefully, including length, width, and ceiling height, and take note of any architectural features such as windows, doors, and built-in shelving.
With your measurements in hand, sketch out a detailed floor plan that includes the placement of key elements such as your workstation, recording area, and acoustic treatment. Think about how you will position your desk, computer, monitors, and recording equipment to facilitate an efficient workflow. Ensure that there is adequate space around each component to allow for comfortable movement and access. Consider using design software or online tools to create a scaled layout and visualize the final setup. A well-designed layout will streamline your workflow, enhance your comfort, and contribute to a more productive recording environment.
Step 2: Acoustically Treat the Room
Acoustic treatment is essential for achieving high-quality sound in your home music studio. The goal is to create a controlled acoustic environment that allows you to accurately hear and mix your recordings. Start by addressing any issues with room acoustics, such as unwanted reflections, standing waves, or excessive reverb.
Begin with the installation of bass traps in the corners of the room to manage low-frequency buildup. These traps help to absorb and diffuse low-frequency sound waves, reducing muddiness and improving overall clarity. Next, add acoustic panels to the walls and ceiling at strategic locations to control mid and high frequencies. These panels reduce reflections and improve the accuracy of sound. For a more balanced sound, consider using diffusers to scatter sound waves and prevent them from becoming focused in specific areas. You can purchase pre-made acoustic treatment products or create your own using materials such as foam, fabric, and wood. Proper acoustic treatment enhances the quality of your recordings and provides a more professional sound environment.
Step 3: Choose and Set Up Your Equipment
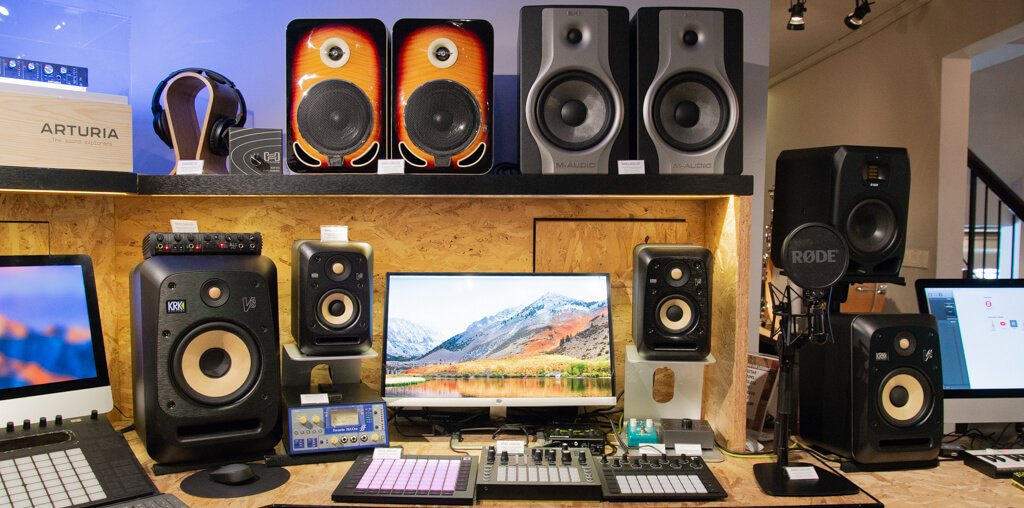
Once your room is acoustically treated, it’s time to select and set up your recording equipment. The core components of a home music studio typically include a computer, audio interface, studio monitors, and microphones. Start by choosing a computer with sufficient processing power and memory to handle audio recording and editing software. Look for a system with a fast processor, ample RAM, and a large hard drive to store your audio files.
An audio interface serves as the bridge between your computer and external audio equipment, providing high-quality input and output connections. Choose an interface that offers the necessary number of inputs and outputs for your recording needs. Invest in studio monitors that deliver accurate sound reproduction, allowing you to hear your music clearly and make precise adjustments. Additionally, select microphones that suit your recording requirements, whether you need them for vocals, instruments, or both. Position your studio monitors at ear level and ensure they are placed equidistant from your listening position for optimal sound accuracy. A well-chosen and properly set-up equipment ensures high-quality recordings and efficient production.
Step 4: Install Acoustic Panels and Treatment
The installation of acoustic panels and treatment materials is a critical step in optimizing the sound quality of your home music studio. Begin by placing bass traps in the corners of the room, as these areas are prone to low-frequency buildup. Secure the traps using adhesive strips or brackets, making sure they are properly positioned to address bass frequencies effectively.
Next, install acoustic panels on the walls and ceiling at the first reflection pointsareas where sound waves bounce off surfaces and reach your ears. These panels can be mounted using adhesive or brackets, depending on the design of the panel and the surface you are attaching them to. Consider adding diffusion panels to break up sound waves and reduce standing waves, creating a more balanced sound environment. Carefully measure and place each panel to achieve optimal acoustic treatment. Proper installation of acoustic materials will result in a more controlled and professional sound environment, improving the accuracy and quality of your recordings.
Step 5: Optimize Your Desk and Workspace
Creating an organized and efficient desk and workspace is essential for a productive home music studio. Begin by arranging your equipmentsuch as your computer, audio interface, and studio monitorsin a way that supports a logical workflow. Ensure that your desk is spacious enough to accommodate all your gear and that it provides easy access to essential controls.
Position your computer and audio interface within easy reach, and place your studio monitors at an optimal distance from your listening position. Use cable management solutions to keep cords and cables organized and minimize clutter. Invest in an ergonomic chair and adjustable desk to ensure comfort during long recording sessions. Consider adding additional storage solutions for keeping your equipment and accessories organized. A well-organized and comfortable workspace enhances your productivity and helps you maintain focus on your music creation.
Step 6: Test and Calibrate Your Setup
The final step in setting up your DIY home music studio is to test and calibrate your equipment to ensure optimal performance. Begin by checking all connections and verifying that your equipment is functioning correctly. Play a variety of test sounds through your studio monitors to ensure they are producing accurate and balanced sound.
Use room measurement tools and software to analyze the acoustics of your studio and make any necessary adjustments to your acoustic treatment. Calibration tools can help you fine-tune the frequency response of your studio monitors and optimize their placement. Conduct test recordings and listen critically to assess the quality of your sound. Make adjustments as needed to address any issues and achieve the best possible audio performance. Proper testing and calibration ensure that your studio is functioning at its best, providing a reliable and accurate environment for recording and mixing.
Conclusion
Building a DIY home music studio is a rewarding project that offers numerous benefits, including cost savings, customization, and the satisfaction of creating a space tailored to your specific needs. By carefully planning your studio layout, addressing acoustic treatment, selecting and setting up equipment, and optimizing your workspace, you can create a high-quality and functional recording environment. This investment not only enhances your ability to create and produce music but also provides a dedicated space where you can fully immerse yourself in your craft.
With the right approach and attention to detail, your DIY home music studio will serve as a valuable asset in your musical journey. Embrace the process of building your studio and enjoy the creative freedom and flexibility it provides. As you continue to develop your skills and explore new musical ideas, your home studio will be an essential tool in achieving your artistic goals and fostering your passion for music.