
Circuit
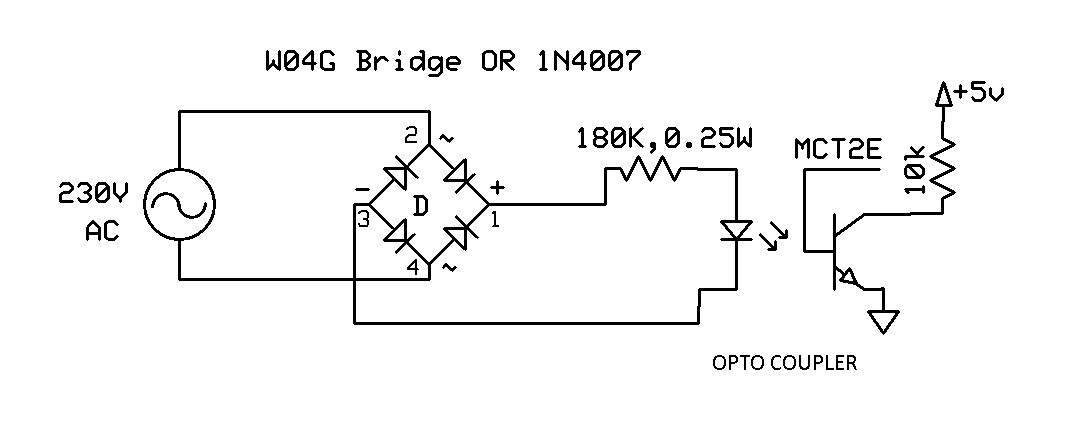
WORKING
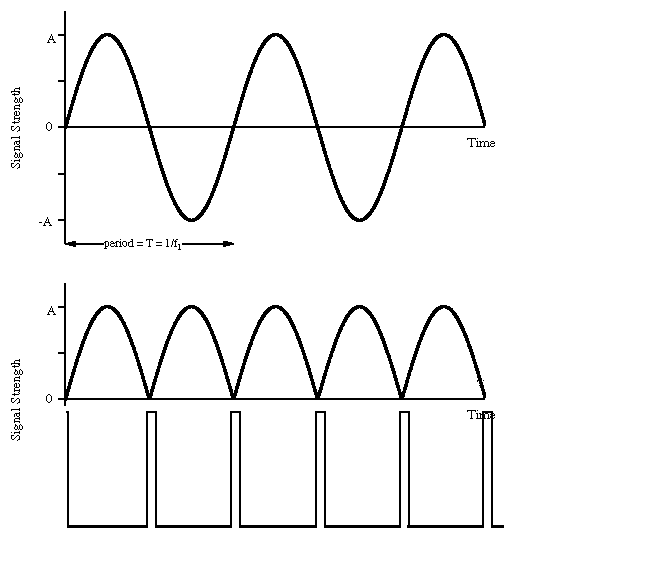
Fig – INPUT AC(230V RMS) , BRIDGE RECTIFIER OUTPUT( DC) AND OUTPUT OF OPTO COUPLER
- bridge rectifier converts ac into dc
- Output of bridge rectifier is fed to opto-coupler
- Led inside the optocoupler requires minimum of 1V to turn on
- when ac wave goes near to the zero crossing line ,ie below 1V led will turn off
- as a result output transistor will turn of and pulled up to 5v
Design
Resistor design (High voltage side)
- From above V-I characteristic of opto coupler led (from datasheet of MCT2E) requires 2mA current at 2V.
- INPUT AC = 230V (RMS voltage)
- Peak voltage of ac = √2 * RMS voltage = 325
- Voltage across Current limiting resistor = 325-2 = 323V (led takes 2V)
- R = V÷I = 323 ÷ (2mA) = 161.5KΩ
take Near standard value of 180 KΩ
collector resistor
this resistor just for pull up the output.it require only small current of 0.3mA.
R = v/i = 25 / 0.3mA = 83KΩ
Take near value of 100kΩ
Advantages
- low cost
- transformerless
- isolated