Home security is a top priority for homeowners across the United States, and advancements in technology have made it easier than ever to protect your property. While professional security systems can be expensive and come with recurring costs, a DIY home security system offers a cost-effective, customizable solution that can be tailored to your specific needs. Whether you’re securing a large home or a small apartment, building your own system allows you to choose the right combination of cameras, sensors, and alarms to suit your preferences. DIY home security gives you full control over installation, maintenance, and monitoring, without the need for contracts or monthly fees.In recent years, the rise of smart home devices has revolutionized how we think about security. Homeowners now have access to a variety of advanced tools and technologies that offer seamless integration and automation. These innovations have empowered individuals to design and implement security systems that rival professional setups in terms of effectiveness and ease of use. Whether you’re tech-savvy or a beginner, setting up a home security system has never been more accessible. This blog will walk you through the process of creating a comprehensive DIY home security system. With the right tools and a bit of technical know-how, you can craft a robust system that protects your home and provides peace of mind. This guide covers everything from selecting components to installation and configuration for optimal security.
Step 1: Assessing Your Security Needs
Before you begin building your DIY home security system, it’s essential to assess your security needs. Start by analyzing the vulnerabilities of your home. Are there entry points, such as doors or windows, that are more susceptible to break-ins? Do you need coverage for outdoor areas, such as driveways or garages? Consider the size and layout of your property, as larger homes may require more extensive coverage.Make a list of the areas that need protection. This will help you determine how many cameras, motion sensors, and alarms are necessary. For instance, if you live in a two-story home, you may need cameras at both front and back entrances, motion sensors for hallways, and window sensors for the second-floor windows. Identifying your specific security requirements in advance ensures that you build a system that addresses all potential risks.In addition to physical vulnerabilities, think about how you use your home. Are there times when no one is home for extended periods? Do you frequently receive deliveries or have visitors? Understanding your lifestyle will help you make informed decisions about what kind of security equipment is most appropriate. For example, if you’re frequently away, a camera with remote viewing capabilities would be beneficial, while someone working from home might prioritize easy-to-use door alarms and window sensors.
Step 2: Choosing the Right Equipment
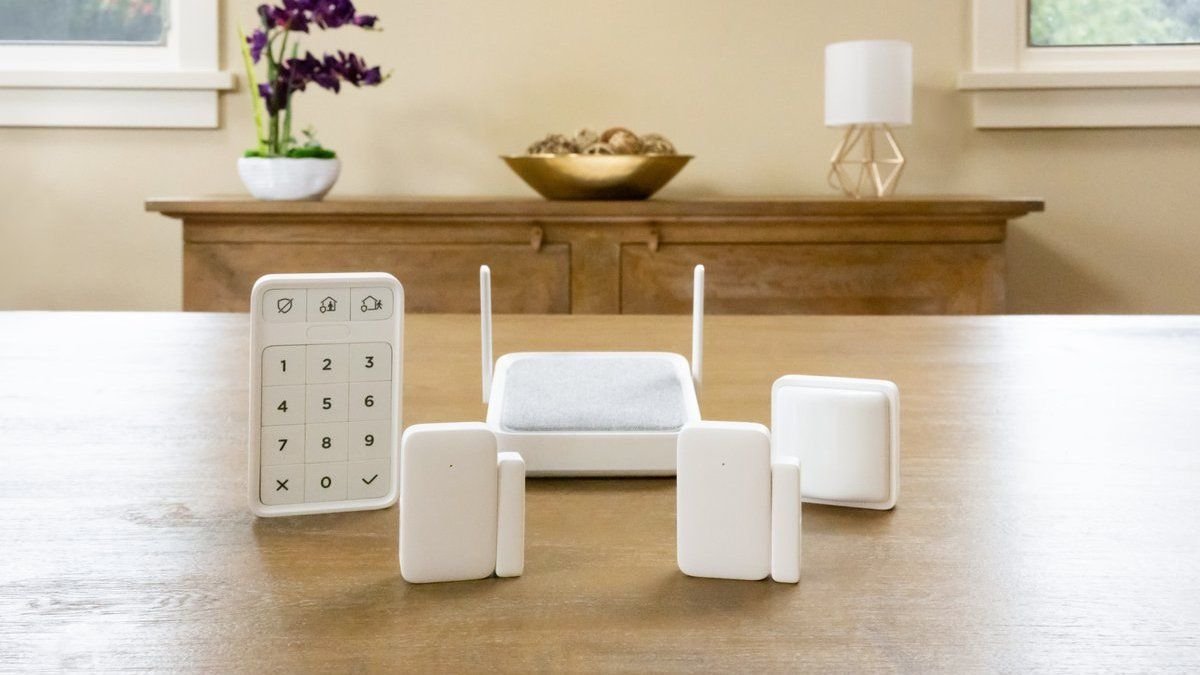
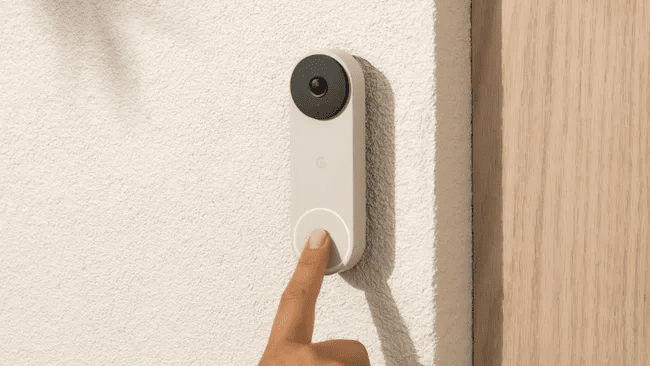
Once you’ve assessed your security needs, the next step is to choose the right equipment for your DIY home security system. There are several types of devices available, each serving a different function. The most common components include security cameras, motion detectors, door and window sensors, smart locks, and alarm systems. Many homeowners also opt for additional devices such as smart doorbells, glass break sensors, and floodlights with built-in cameras for enhanced security.When selecting equipment, consider both indoor and outdoor security. For outdoor cameras, look for models that are weatherproof and equipped with night vision to ensure visibility in low-light conditions. Indoor cameras should offer features like motion detection and two-way audio for added functionality. Smart door locks and sensors can notify you when doors or windows are opened, while motion detectors trigger alerts when movement is detected in certain areas. It’s important to invest in reliable, high-quality devices to ensure your system works effectively.Also, consider whether you want a completely wireless system or a hybrid system that combines wireless and wired components. Wireless systems are easier to install and more flexible in terms of placement, but they depend on battery life and a reliable Wi-Fi connection. Wired systems, on the other hand, offer a more stable connection but are more difficult to install and often require professional help. Choose the option that best fits your technical comfort level and the structure of your home.
Step 3: Installing Security Cameras
Security cameras are a key component of any home security system, providing real-time monitoring of your property. When installing your DIY security cameras, strategic placement is crucial for effective coverage. Begin by identifying high-traffic areas, such as entryways, driveways, and backyards, where cameras can capture anyone approaching your home. Cameras should also cover less obvious areas like side doors, windows, and dark corners, where intruders are more likely to enter.Once you’ve decided where to place your cameras, follow the manufacturer’s instructions for installation. Most modern security cameras are wireless, making installation relatively simple. Mount the cameras at least 8 to 10 feet above the ground for a clear view, and adjust them to avoid blind spots. Ensure the cameras are connected to your Wi-Fi network for remote monitoring. Many systems come with mobile apps that allow you to view live footage, receive alerts, and even speak to visitors using two-way audio.When selecting cameras, think about how many features you need. Some cameras come with advanced features like motion-activated recording, facial recognition, and automatic panning. These features can be helpful, but they may also be overkill for basic home monitoring. Make sure to balance your needs with the complexity of the camera to ensure you have a system that works well for your home environment without unnecessary complications.
Step 4: Setting Up Motion Detectors and Sensors
In addition to cameras, motion detectors and sensors play an important role in your DIY home security system. Motion detectors are typically installed in key areas of your home, such as hallways, living rooms, and staircases, where movement is easily detected. These devices can trigger alarms, lights, or notifications when unexpected motion is detected. When positioning motion detectors, avoid placing them near heating vents, windows, or areas where pets frequently move, as these can cause false alarms.Door and window sensors provide another layer of security by notifying you when an entry point is breached. These sensors consist of two parts: one attached to the door or window and the other to the frame. When the door or window is opened, the magnetic connection between the two parts is broken, triggering an alert. Install sensors on all accessible doors and windows, especially those on the ground floor. Some systems also include glass break sensors, which detect the sound of shattering glass and can notify you immediately of a potential break-in.To enhance effectiveness, you can pair your motion sensors with smart lighting systems. When motion is detected, smart lights can turn on, making it easier to identify intruders while simultaneously startling them. Many DIY security kits offer integration with smart lighting, which can be controlled remotely via a smartphone app, giving you even more control over how your system operates.
Step 5: Configuring Alarms and Alerts
Alarms are an essential component of any home security system, providing an immediate response when a security breach is detected. In a DIY system, alarms can be configured to sound when motion is detected, a sensor is triggered, or a door or window is opened. Choose alarms that are loud enough to alert you and your neighbors, deterring potential intruders. In addition to audible alarms, many systems offer mobile notifications, so you can receive real-time alerts directly to your phone, no matter where you are.Most DIY security systems are integrated with mobile apps that allow you to customize alerts. You can set specific triggers for alarms, such as movement in certain areas or at certain times of day. Additionally, many systems allow you to create “modes,” such as “Home,” “Away,” or “Night,” which adjust the sensitivity of sensors and cameras based on your activity. This level of customization ensures that your system fits your lifestyle while still providing the necessary security.If you frequently travel or leave your home unattended, you can even link your alarm system to third-party monitoring services. These services can contact local law enforcement in case of a break-in, providing an added layer of security while you’re away. This added service can give you peace of mind, knowing that someone is always keeping an eye on your home.
Step 6: Monitoring and Maintaining Your System
Once your DIY home security system is installed and configured, regular monitoring and maintenance are critical to ensure it continues to function properly. Start by testing all components to confirm that cameras, motion detectors, sensors, and alarms are working as expected. Review camera footage regularly to check for any unusual activity, and ensure that all devices are connected to your Wi-Fi network for continuous remote access.In terms of maintenance, keep cameras clean and free of obstructions, such as overgrown branches or snow buildup, which can hinder their effectiveness. Replace batteries in wireless devices, such as motion detectors and sensors, as needed. Additionally, periodically update the software on your system and mobile app to ensure they are running the latest security features and patches. A well-maintained system will continue to protect your home and provide peace of mind for years to come.It’s also a good idea to periodically review your security system’s coverage and effectiveness. As technology evolves, new security features may become available that could further enhance your DIY setup. Staying informed and upgrading your system when necessary will keep your home security on the cutting edge, ensuring ongoing protection against potential threats.
Conclusion
Setting up a DIY home security system offers numerous benefits, including cost savings, customization, and flexibility. By assessing your security needs, selecting the right equipment, and following a systematic installation process, you can create a comprehensive system that provides reliable protection for your home. While building your own system requires some initial effort, the ability to monitor and control your home’s security from anywhere provides long-term peace of mind.DIY home security systems allow homeowners to take charge of their own safety without being tied to professional installation costs or monthly monitoring fees. With the right tools and a little technical know-how, you can safeguard your home, protect your loved ones, and stay in control of your security. By following this guide, you are now equipped to create an effective DIY home security system tailored to your specific needs, ensuring that your home is always safe and secure.