Home organization is a key aspect of creating a functional and aesthetically pleasing living space, and closets play an essential role in this process. While many homeowners purchase ready-made closet systems, building your own closet furniture with doors offers the advantage of customization. A DIY home closet project allows you to design a closet that fits perfectly in your space and caters to your specific storage needs. From choosing the right materials to deciding on the design and finishing, building your own closet furniture can transform your storage area into a highly functional and stylish feature of your home.In this guide, we will walk you through the step-by-step process of creating DIY home closet furniture with doors. Whether you need a small wardrobe for a bedroom or a more extensive system for a walk-in closet, the instructions provided here will equip you with the knowledge and confidence to tackle this project. With the right tools, materials, and a bit of patience, you can build a customized closet that enhances the organization of your belongings while adding value to your home. Let’s get started on crafting the perfect closet furniture with doors to meet your needs.
Step 1: Planning and Measuring Your Space
Before you begin building your DIY home closet furniture, proper planning and measurements are essential to ensure your design will fit the available space. Start by assessing the location where you plan to install the closet furniture. Measure the height, width, and depth of the space to get accurate dimensions for your project. It’s important to take into account any obstacles, such as light switches, outlets, or baseboards, which could impact your design.Once you have the measurements, you should decide on the type of storage solutions you need. Are you looking for a basic hanging rod and shelves, or do you want to incorporate drawers, cubbies, and shoe racks? Think about your specific storage needs, such as how much hanging space is required versus shelving. Consider creating a sketch or using online closet design tools to visualize the layout. Having a clear design plan in place will make the building process smoother and ensure you don’t overlook any details.
Step 2: Choosing Materials and Tools
Selecting the right materials is critical to building durable and attractive closet furniture. For a professional finish, most DIY closet furniture is built using plywood, medium-density fiberboard (MDF), or solid wood. Plywood is a popular choice because it’s sturdy, relatively lightweight, and affordable. If you prefer a more high-end look, hardwoods like oak or maple are excellent options but come at a higher cost. MDF is also an option for a budget-friendly approach, but it may not be as durable as plywood or hardwood.In addition to wood, you will need hardware for assembling the closet furniture and installing the doors. This includes screws, hinges, drawer slides, and handles or knobs for the doors. The tools you’ll need for this project include a measuring tape, circular saw or table saw, drill, level, screwdriver, and a sander for smooth finishing. Before beginning the construction, ensure you have all the necessary tools and materials so that you won’t need to pause mid-project to gather additional supplies.
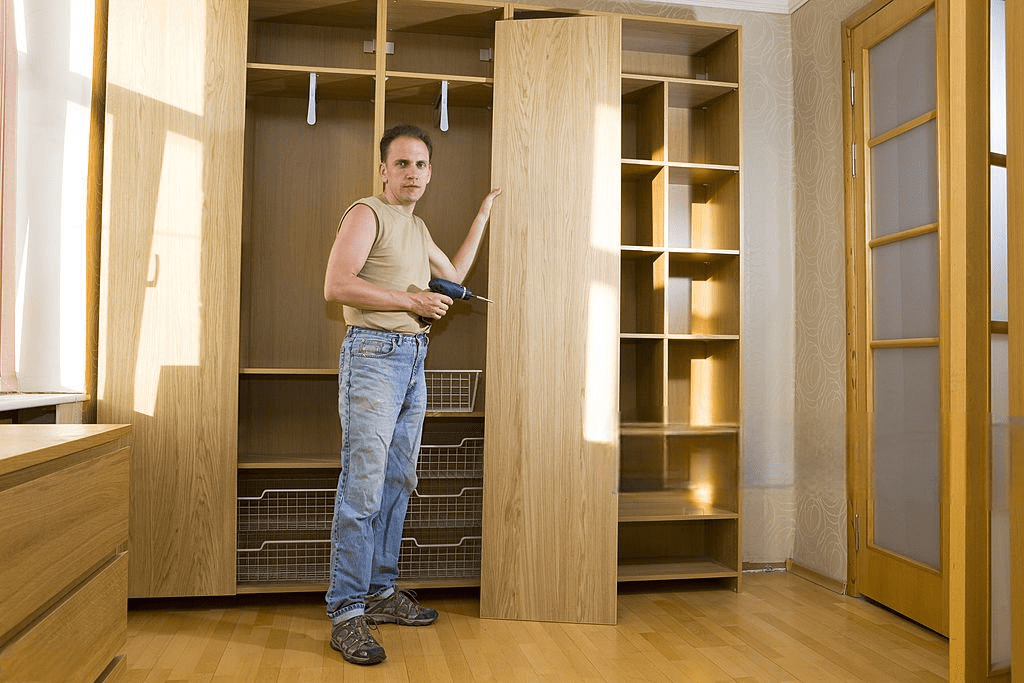
Step 3: Building the Closet Frame
With your materials and tools ready, it’s time to start building the frame of your closet furniture. The frame provides the structure for your entire closet system, so it’s important to take your time to ensure accuracy and stability. Start by cutting the pieces of wood for the sides, top, and bottom of the frame. If your design includes shelving or dividers, cut those pieces as well.Assemble the sides and back of the frame first, ensuring that everything is level and square. You can use wood glue and screws to secure the pieces together. For extra stability, adding a back panel is recommended. Once the frame is assembled, install any interior components, such as shelves or dividers. Be sure to measure and mark where these will be placed before attaching them, as it is easier to make adjustments before securing them permanently. Use a level to ensure all shelves are aligned properly, and secure them with screws or brackets as needed.
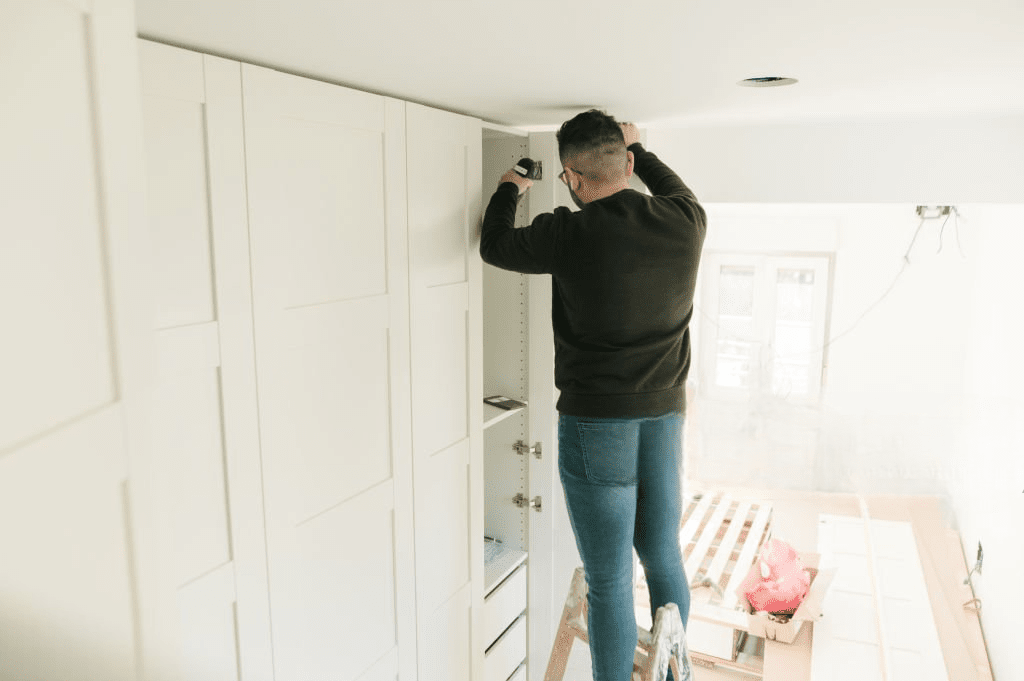
Step 4: Adding the Closet Doors
One of the most significant aspects of this DIY project is installing the doors, which will give your closet a polished, professional appearance. There are several options for closet doors, including hinged doors, sliding doors, and bi-fold doors. Hinged doors are the most straightforward option for a DIY project, as they require basic hinges and are easy to install. Sliding doors are space-saving but may require more complex hardware.Start by cutting the doors to the correct size based on your closet frame measurements. If you’re using plywood or MDF, sand the edges to create a smooth surface. Attach the hinges to the doors before securing them to the frame. Be sure to leave a small gap between the doors and the frame to allow for easy opening and closing. Use a level to ensure that the doors are aligned and adjust the hinges as necessary. If your design includes sliding doors, install the door tracks first, following the manufacturer’s instructions, and ensure the doors slide smoothly on the rails.
Step 5: Finishing the Closet with Paint or Stain
Once the structure and doors of your closet furniture are in place, it’s time to add the finishing touches. Finishing not only enhances the appearance of the closet but also protects the wood from wear and tear. Depending on your style preference, you can either paint or stain the closet furniture. If you prefer a clean, modern look, painting the closet in a neutral color like white or gray is a popular choice. For a more natural or rustic appearance, consider staining the wood to bring out the grain and texture.Before applying paint or stain, make sure to sand the entire surface of the closet furniture. This will create a smooth surface for the finish and help it adhere properly. If you are painting, apply a primer first, then follow with at least two coats of paint, allowing each coat to dry completely. For staining, apply the stain evenly with a brush or cloth, and then finish with a clear protective sealant to preserve the wood’s appearance. Taking the time to properly finish your closet will give it a polished, professional look and ensure it lasts for years to come.
Step 6: Installing Additional Features and Organizers
After finishing the closet furniture, you can enhance its functionality by adding extra features such as drawers, hanging rods, and pull-out organizers. If your design includes drawers, install the drawer slides into the frame and attach the drawers, making sure they open and close smoothly. Hanging rods can be easily installed using brackets and screws, providing ample space for hanging clothes. Make sure the rod is at the appropriate height for your needs, and consider installing a second rod below for additional hanging space if your closet height allows.You can also add accessories like shoe racks, tie holders, and shelf dividers to further organize the closet. Many retailers offer ready-made closet accessories that can be installed into your DIY closet furniture with minimal effort. Installing these additional features will maximize your storage space and make the closet more functional for daily use. Think about how you can tailor the closet to your specific needs by adding customizable organizers that suit your wardrobe and accessories.
Conclusion
Building your own DIY home closet furniture with doors is a rewarding project that allows you to create a fully customized storage solution. From the initial planning and measuring phase to the final touches of adding doors and painting, each step is an opportunity to craft a closet that fits perfectly within your space and meets your organizational needs. While the project requires careful planning, attention to detail, and the right tools, the result is a piece of furniture that not only serves a practical purpose but also enhances the aesthetic of your home.By following these steps, you can create a personalized closet that reflects your style and provides ample storage for your belongings. Whether you’re looking to build a small wardrobe or a large walk-in closet system, the flexibility of a DIY project allows you to design a solution that works for you. With the right materials and a little effort, your DIY home closet furniture with doors will become a functional and stylish addition to your home, offering long-lasting value and satisfaction.