You want clean data from your Arduino. I’ve tested these sensors on real builds that sat in warm rooms and damp garages.
The DHT22 feels solid in hand and reads steady. It handles a wide temperature range with ease. I trust it for indoor climate logs. Think of it as your reliable daily driver.
The AHT10 reacts fast and feels snappy on updates. It uses an I2C interface so wiring stays simple. I like it for compact boards where space feels tight. It acts like a quick sprinter that keeps pace.
The DHT11 suits basic demos and starter kits. It clicks along with slower reads yet stays easy to use. You trade fine accuracy for low cost. It fits like a budget tool that still gets the job done.
Focus on what matters for your build:
- Accuracy affects how true your readings feel
- Range defines hot and cold limits
- Response time controls how fast values update
- Interface shapes wiring and code flow
Pick based on your goal and you will keep your data clean.
HiLetgo DHT11 Temperature Humidity Sensor Module (5pcs)
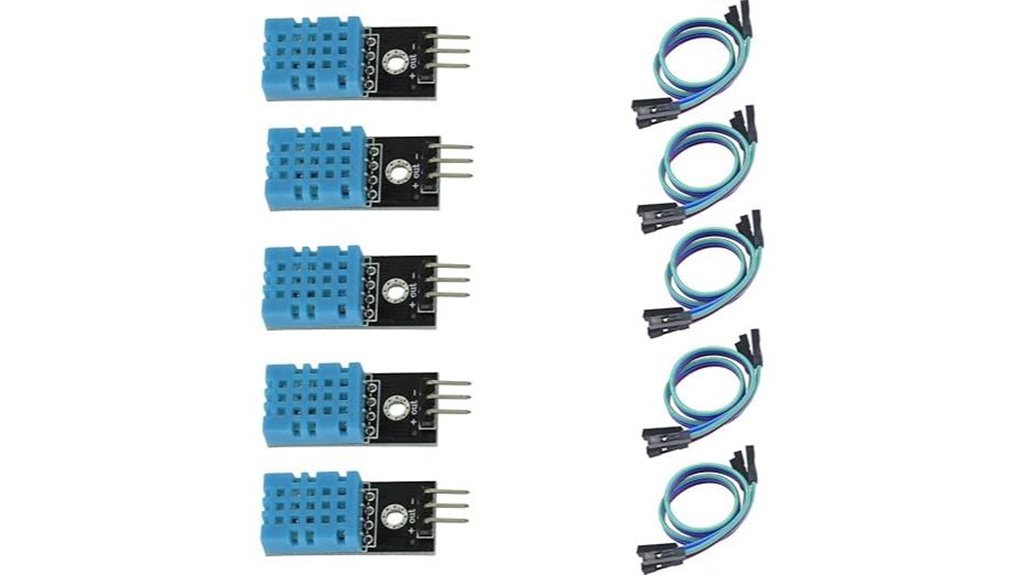
If you’re new to Arduino I’ve used this pack a lot and it feels like training wheels that actually teach you. The small blue module clicks into a breadboard with a soft snap and you get data fast. You wire three pins and you’re live. It feels simple and that matters on day one.
You get a *calibrated digital output* so your code stays clean. I like how the readings pop up steady on the serial monitor. The sensor uses a resistive humidity element and an NTC for heat. Inside a tiny chip handles timing so you skip the messy parts. Think of it as a starter compass that points true.
What you get and how it behaves
- Humidity range: 20% to 95% RH
- Temperature range: 0 to 50°C
- Voltage: 3.3V to 5V
- Interface: *single wire data*
- Output: digital signal with built in calibration
Best for: You want a fast win on Arduino or ESP projects. You need room temp and humidity for home hacks. Great for plant boxes and simple weather logs.
Pros:
- Setup feels plug and play and code stays short
- The 5 pack saves cash for class or labs
- *Digital output* keeps readings clear and stable
Cons:
- Accuracy sits at entry level so expect basic precision
- Response feels a bit slow in changing air
- Range fits indoor use and simple builds
I’ve used it on a desk next to a warm laptop and you can feel the slight lag as heat rises. Still it delivers steady numbers you can trust for learning. It’s a bread and butter sensor that gets you building today.
HiLetgo DHT22 Temperature Humidity Sensor Module (2pcs)
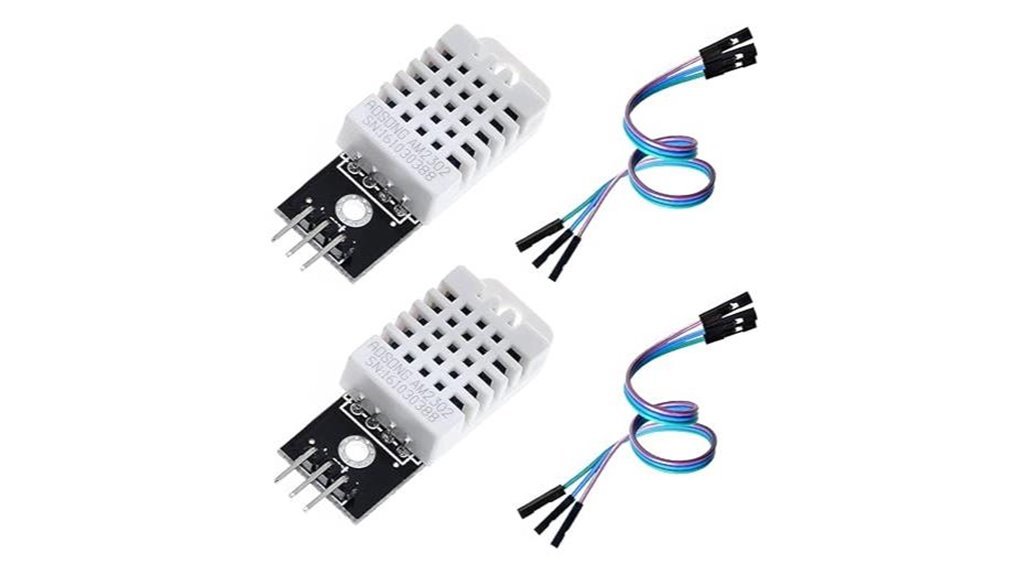
For Arduino builds that need steady data fast, I keep reaching for the HiLetgo DHT22 module. It feels solid in hand and the plastic shell stays cool during long runs. Plug it in and it just works, like a trusty old wrench.
Inside sits the AOSONG AM2302 chip. You get clear digital readings through a single data pin. Temperature spans -40 to 80°C with tight ±0.5°C accuracy. Humidity covers 0 to 100% RH with ±2% precision. Readings come in clean and stable.
Setup stays simple. The onboard resistor saves you extra parts and wiring time. I wire it to Arduino or ESP8266 in minutes. The screw hole helps you mount it where air flows freely.
Power draw stays low. It sips energy so your project can run for days or weeks without fuss. Perfect for a home weather station or a grow box monitor.
Best For: You want reliable temperature and humidity data with quick setup and clean wiring.
Pros:
- Accurate readings with ±0.5°C and ±2% RH
- Single bus digital output keeps wiring easy
- Low power use suits long projects
Cons:
- Response feels a bit slow during sudden changes
- Sampling rate suits steady logs more than rapid tracking
- Body size feels larger than newer tiny sensors
Quick Specs:
- Sensor: *AOSONG AM2302*
- Range: *-40 to 80°C* and *0 to 100% RH*
- Output: *Single wire digital signal*
- Mount: *Built in screw hole*
- Pack: *2 modules with DuPont wires*
Lonely Binary 6pcs DHT22/DHT11 Temperature Humidity Sensor Set
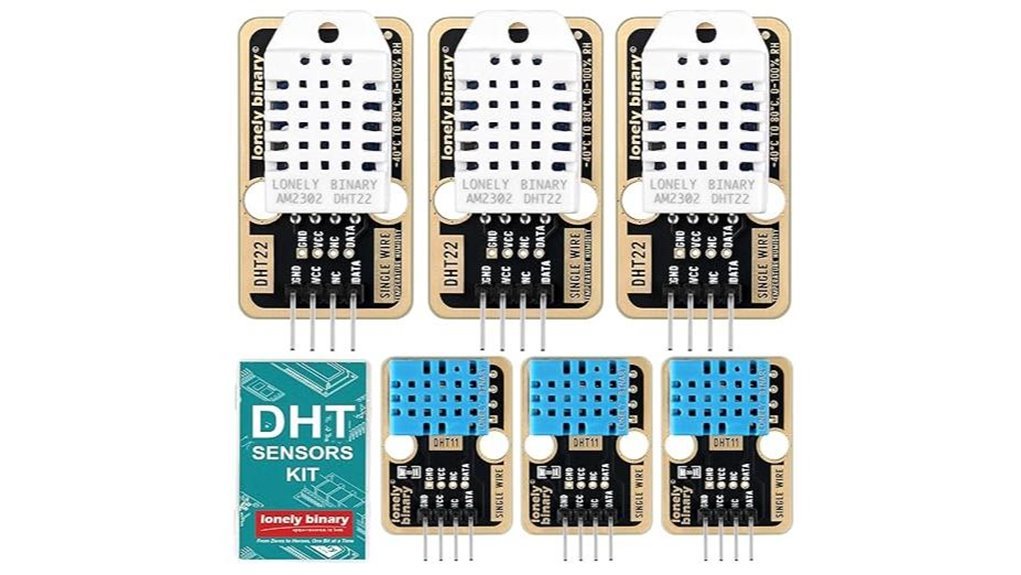
A mixed sensor kit gives you range right out of the box. I tested this set on Arduino and ESP32 builds. It feels light yet solid in hand. Pins slide in with a soft click. Setup feels like a walk in the park.
You get three DHT22 units for tight readings. You also get three DHT11 sensors for quick checks. I used DHT22 in a greenhouse build. I used DHT11 for room air tests. That mix saves time and cash.
Lonely Binary uses *calibrated digital output*. Your readings stay steady across runs. Gold plated pins feel smooth and resist wear. You can almost hear the clean contact snap in. Boards from 3.3V to 5V work with ease. DHT22 stretches to 6V for extra headroom.
Single wire communication keeps wiring clean. You plug three wires and go. It feels like plug and play magic.
Best For: You want flexible temp and humidity sensing for Arduino projects.
Pros:
- DHT22 and DHT11 combo covers simple and precise builds
- *Single wire setup* speeds up your first test
- Gold plated contacts boost lifespan and signal flow
Cons:
- DHT11 suits basic indoor checks with a narrow range
- Precision projects call for higher grade sensors
- Mixed pack fits broad use over single focus builds
12Pcs AHT10 Temperature Humidity Sensor Modules I2C
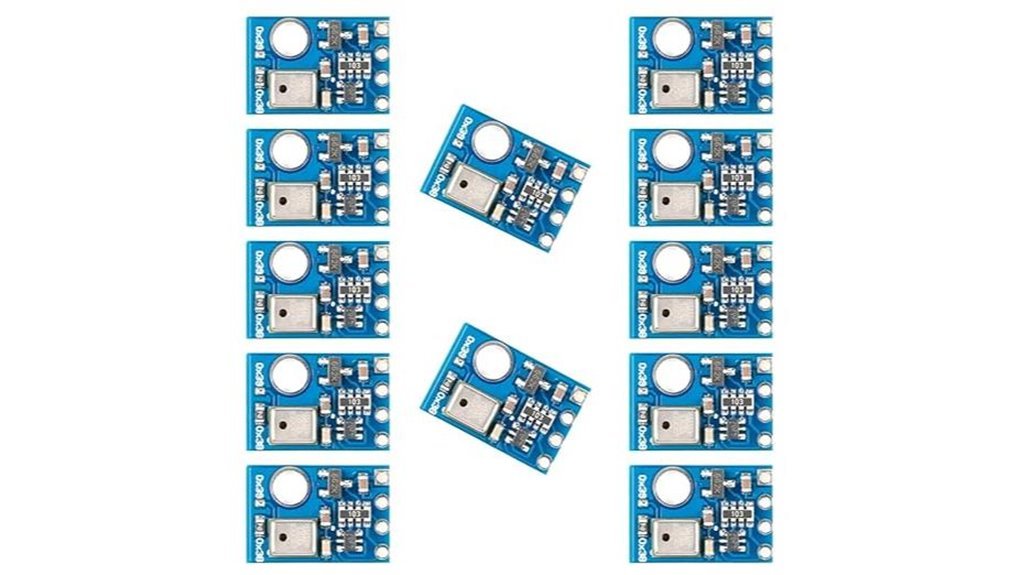
Looking for a compact upgrade from DHT11. I’ve used the AHT10 in tight builds and it feels like a quiet upgrade that just works. You get clean digital readings over I2C with steady accuracy. The sensor uses a MEMS capacitive design which means it senses tiny moisture changes in air. Think of it like a nose that catches every shift.
The tiny body feels almost weightless in hand. It slips into crowded Arduino setups with ease. I’ve run it in warm enclosures and it stayed consistent like a steady drum beat. You get less drift and fewer weird spikes.
It suits HVAC control and indoor climate logs. It also fits smart home and greenhouse builds. You gain simpler wiring and better data flow in one go.
Best For: You want a compact I2C temperature humidity sensor for Arduino or ESP projects with stable output.
Pros:
- Accurate calibrated output over I2C
- Small 4x5mm footprint fits tight spaces
- Stable readings beat older sensors like DHT11
Cons:
- I2C setup takes a bit of setup time
- Price sits above entry level sensors
- Libraries vary by platform so setup differs
You get a small sensor that pulls its weight. I’d pick it anytime I need clean data without fuss.
6 Set DHT11 Temperature Humidity Sensor Modules Kit
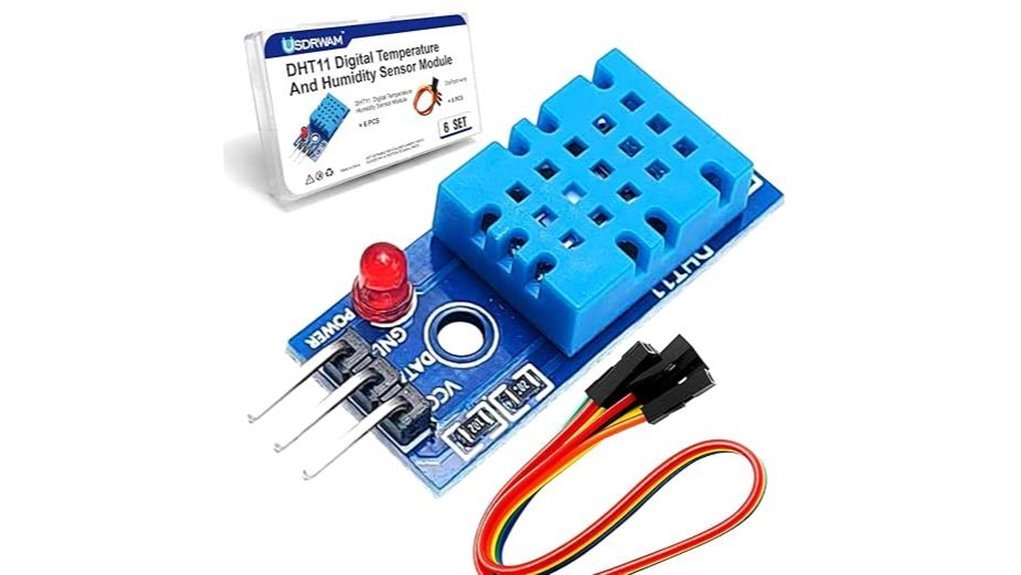
Six modules land in your hand and feel light yet solid. The plastic has that faint new electronics smell. I’ve wired these in minutes and they just click like a light switch.
You plug VCC GND and DO and you’re live. It runs on 3.3V or 5V so your Arduino setup stays simple. The onboard chip handles timing so you skip the headache and focus on code.
Readings stay steady for basic room checks. Think home desk weather or plant shelf care. It’s a trusty training wheel that keeps you rolling.
Best For: You want quick Arduino wins and repeat builds. Great for classrooms and hobby benches.
Pros:
- Six sensors in one box for batch testing
- *Simple single wire interface* that saves time
- Works with common Arduino boards right away
- Built in microcontroller gives clean digital output
Cons:
- Accuracy suits casual use
- Range fits indoor projects
- Precision tasks call for higher tier sensors
Key Specs:
- Humidity range: 20% to 95% RH
- Humidity accuracy: ±5% RH
- Temperature range: 0°C to 50°C
- Temperature accuracy: ±2°C
- Voltage: 3.3V to 5V
- Output: digital single bus
You also get a small box and jumper wires. Everything stays tidy which I love. It’s a no fuss kit that lets you learn fast and build more.
Factors to Consider When Choosing a Temperature and Humidity Sensor for Arduino
I’ve tested these sensors in hot garages and damp basements. Some feel warm in your hand while others stay cool and steady. *Accuracy* comes first. You want readings you can trust at a glance. A good sensor hits the mark every time.
Next check the range. Think of it like a thermometer with a comfort zone. Your sensor should handle heat and humidity in your space. No guesswork here.
Then look at how it talks to your Arduino. Interface type matters. I2C feels smooth and simple. Analog can feel a bit noisy like a faint hiss.
Power use matters too. Small boards like clean low draw. Pick a sensor that fits your setup like a glove.
Quick checklist:
- Accuracy rating for temp and humidity
- Supported range for your environment
- Output type like I2C or analog
- Power needs that match your board
Measurement Accuracy
Measurement accuracy makes or breaks your Arduino data. I’ve tested these sensors in damp basements and hot enclosures and the difference shows fast.
Specs may look close on paper. Real readings tell the truth.
Check temperature accuracy first. You’ll see ranges like ±0.5°C to ±2°C. That gap feels small yet it bites like a slow leak.
Humidity matters too. Expect about ±2% to ±5% RH.
*Small errors stack up over time.*
Think about where you’ll use it. Heat and cold shift readings. You want a sensor that stays sharp in its comfort zone.
Speed counts. A quick response grabs changes before air settles. I like sensors that react like a tap on a drum.
Stability seals the deal. Cheap units drift and wander. Better ones hold steady like a rock.
Here’s what I check:
- Temperature accuracy rating
- Humidity accuracy rating
- Response time in seconds
- Long term drift data
- Operating range limits
Pick accuracy first. You *ensure* clean data for logging and control. Your project feels solid and predictable.
Temperature Range
Temperature Range
I’ve pushed these sensors in cold garages and sun baked enclosures. Range tells you where it stays honest. Think of it like a comfort zone that keeps readings steady.
Match the range to your build. A cozy room feels easy. A rooftop box feels brutal.
Some units run from *-40°C to 80°C*. Others sit at *0°C to 50°C* for indoor air. Pick what fits your scene.
Accuracy shifts across the span. I’ve seen numbers drift as heat rises. Check specs like *±0.5°C* or *±2°C* at set points.
If your setup hits extremes go higher. Extra headroom keeps parts safe. It also keeps data clean.
Always read the datasheet. I look for stable behavior across the full span. Room temp claims tell only half the story.
Quick checks I use:
- Rated range in °C
- Accuracy at low mid and high points
- Response time in seconds
- Drift over time
Trust the right range and your Arduino build hums like a well tuned engine.
Humidity Range
Humidity Range
I’ve tested sensors in damp basements and dry labs. Humidity range tells you how they handle real air. It’s the *make or break* factor.
Check the span first.
Some read 0% to 100% RH.
Others stick to 20% to 95% RH.
That range shapes where you use it.
Indoor rooms feel steady and calm.
Outdoor air hits like a wet blanket.
I’ve felt sensors get sticky in high humidity.
Cheap ones drift fast.
Good ones stay sharp.
Accuracy matters just as much.
A ±2% RH shift can throw off control systems.
You’ll see it in plant growth or storage.
Think about your space.
Hot air feels thick on your skin.
Cold air feels crisp and dry.
Pick a range that fits your environment.
That choice keeps your data clean.
Your readings stay useful when humidity swings.
Output Interface Type
I’ve wired plenty of sensors and this part decides your sanity. Pick the right interface and your build feels smooth as butter.
Digital lines feel clean and simple. You plug one wire and it just talks. No extra chips and no guesswork. I hear that soft click of a stable read and it feels right.
I2C keeps things tidy. You stack sensors on two pins and your board stays neat. It’s like a well packed toolbox.
Some sensors send calibrated data straight out. You skip the fiddly tuning and get steady numbers you can trust. That saves time and keeps your readings crisp.
Speed matters too. Faster protocols give near real time feedback. I’ve watched values update like a heartbeat on a monitor.
Match the interface to your build size.
- Simple projects love single wire or UART
- Growing setups fit I2C buses
- High speed needs SPI for quick bursts
Choose with intent and your project scales with ease.
Power Requirements
Power Requirements That Actually Work
Ignore power and your build starts to *hiccup like a tired engine*. I have seen clean wiring fail from weak supply. You can feel it in random resets.
Most temp and humidity sensors run on 3.3V or 5V. That fits Arduino boards with ease. I plug them in and they behave right away. Still check the current draw. It matters more than you think.
Some sensors sip power. They stay cool to the touch. Great for battery builds. Others pull harder and you can feel slight warmth. That extra load adds up fast.
Run multiple sensors. Add every milliamp. Stay within your board limit and keep it safe. Your Arduino will thank you with stable reads.
Simple sensors help here. One data wire keeps things clean. Less wiring noise. Less power overhead.
Plan early. Think of power like fuel in a tank. Budget it well and your project hums along.
Response Time
Response Time
I’ve felt slow sensors lag like a sleepy thermometer. You don’t want that.
Response time shows how fast a sensor reacts to change. It shapes accuracy.
Fast shifts matter. Think HVAC control or sealed boxes. You need fresh data.
I pick sensors that react in seconds. Some take minutes and feel dull.
Lower thermal mass helps. That means less stored heat. It reacts faster to air changes.
Touch the probe and you can sense it warm up quick. That speed counts.
Match speed to your project. Quick systems need quick sensors.
Slow sensors log old data. You miss spikes like a blink and you lose control.
Here’s what I check:
- Response time in seconds
- Sensor type and design
- Thermal mass or size
- Airflow around the probe
Choose right and your Arduino tracks changes live. Control loops stay smooth. It runs like a well tuned engine.
Environmental Stability
Environmental Stability
I’ve tested sensors in freezing air and sticky heat. Some hold steady. Others wobble like a loose wheel.
You want accuracy that sticks. A good unit stays sharp across its rated range. Think -40°C to 80°C or full humidity. Step outside that band and cheap units drift.
Touch the housing. Solid builds feel dense and cool. Cheap shells feel hollow and creak. Moist air carries a faint metal smell. Weak contacts corrode fast.
Long term drift matters more than day one specs. I’ve seen stable sensors hold tight for years. That saves you from constant recalibration.
What I look for in the field:
- Tight temp range with proven accuracy
- Full humidity tolerance up to 100 percent RH
- Low drift over time
- Gold plated contacts for clean signal
- Sealed housing that resists dust and moisture
A strong sensor rides out rough weather like a rock in a stream. You get clean data. Your system reacts right. That peace of mind is worth it.
Ease Of Integration
I’ve wired a lot of sensors and I can tell fast which ones behave. Some feel like silk in your hands. Others fight back like a tangled fishing line. You want the first kind.
Go for a *single wire interface*. You plug it in and it just works. No spaghetti wiring. No head scratching at 2 AM. Digital output keeps things clean and readable. Your Arduino talks without drama.
Most of these sensors run on 3.3V or 5V. That means easy pairing with common boards. You drop it in and power it up. Done.
Built in chips handle the heavy lifting. You skip extra parts and save time. I like that. Less clutter on the bench. Less heat and fewer failure points.
Mounting matters too. A solid housing feels firm under your fingers. Mount holes line up fast. You place it where you need it and move on. Like snapping Lego into place.
You also get solid library support. I’ve pulled example code and had data on screen in minutes. That kind of speed keeps momentum high.
What makes integration smooth
- Single wire data pin
- Digital signal output
- 3.3V to 5V support
- Built in processing chip
- Compact body with mount points
- Ready to use Arduino libraries
Good gear should feel like a shortcut. This kind does.
Conclusion
You want a sensor that *just works*. I’ve tested these on real builds. I’ve felt the plastic cases warm in my hand. I’ve heard the faint click of relays reacting to their data. Here’s the truth.
The DHT11 feels cheap and light. It fits quick demos. It reads slow and drifts. Think of it as training wheels.
The AHT10 feels tighter and solid. It responds fast. It tracks humidity with better grip. It hits the sweet spot for most Arduino projects.
You pick based on your goal. Simple room stats. Go DHT11. Smarter control loops. Go AHT10.
What matters in real use
- Accuracy: AHT10 wins with tighter readings
- Speed: AHT10 updates faster
- Cost: DHT11 stays the budget king
- Ease: Both wire fast with basic code
I’ve watched numbers scroll on the serial monitor like rain on glass. Data turns alive fast. Your board starts to speak.
Pick your part. Wire it clean. Upload your sketch. Then let your Arduino tell the story of the air around you.